
The new Raspberry Pi Pico is very different from a traditional Raspberry Pi. Pico is a microcontroller, rather than a microcomputer. Unlike a Raspberry Pi it’s a platform you develop for, not a platform you develop on.
But you still have choices if you want to develop for Pico, because there is both a C/C++ SDK and an official MicroPython port. Beyond that there are other options opening up, with a port of CircuitPython from Adafruit and the prospect of Arduino support, or even a Rust port.
Here I’m going to talk about how to get started with the C/C++ SDK, which lets you develop for Raspberry Pi Pico from your laptop or Raspberry Pi.
I’m going to assume you’re using a Raspberry Pi; after all, why wouldn’t you want to do that? But if you want to develop for Pico from your Windows or Mac laptop, you’ll find full instructions on how to do that in our Getting Started guide.
Blinking your first LED
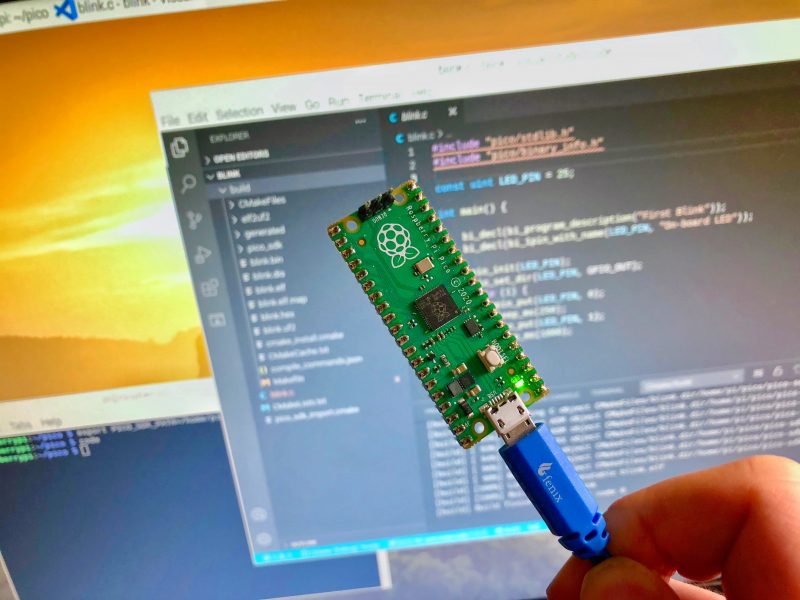
When you’re writing software for hardware, the first program that gets run in a new programming environment is typically turning an LED on, off, and then on again. Learning how to blink an LED gets you halfway to anywhere. We’re going to go ahead and blink the onboard LED on Pico, which is connected to pin 25 of the RP2040 chip.
We’ve tried to make getting started with Raspberry Pi Pico as easy as possible. In fact, we’ve provided some pre-built binaries that you can just drag and drop onto your Raspberry Pi Pico to make sure everything is working even before you start writing your own code.
Go to the Getting Started page and click on the “Getting started with C/C++” tab, then the “Download UF2 file” button in the “Blink an LED” box.
A file called blink.uf2 will be downloaded to your computer. Go grab your Raspberry Pi Pico board and a micro USB cable. Plug the cable into your Raspberry Pi or laptop, then press and hold the BOOTSEL button on your Pico while you plug the other end of the micro USB cable into the board. Then release the button after the board is plugged in.
A disk volume called RPI-RP2 should pop up on your desktop. Double-click to open it, and then drag and drop the UF2 file into it. The volume will automatically unmount and the light on your board should start blinking.
Congratulations! You’ve just put code onto your Raspberry Pi Pico for the first time. Now we’ve made sure that we can successfully get a program onto the board, let’s take a step back and look at how we’d write that program in the first place.
Getting the SDK
Somewhat unsurprisingly, we’ve gone to a lot of trouble to make installing the tools you’ll need to develop for Pico as easy as possible on a Raspberry Pi. We’re hoping to make things easier still in the future, but you should be able to install everything you need by running a setup script.
However, before we do anything, the first thing you’ll need to do is make sure your operating system is up to date.
$ sudo apt update
$ sudo apt full-upgrade
Once that’s complete you can grab the setup script directly from Github, and run it at the command line.
$ wget -O pico_setup.sh https://rptl.io/pico-setup-script
$ chmod +x pico_setup.sh
$ ./pico_setup.sh
The script will do a lot of things behind the scenes to configure your Raspberry Pi for development, including installing the C/C++ command line toolchain and Visual Studio Code. Once it has run, you will need to reboot your Raspberry Pi.
$ sudo rebootThe script has been tested and is known to work from a clean, up-to-date installation of Raspberry Pi OS. However, full instructions, along with instructions for manual installation of the toolchain if you prefer to do that, can be found in the “Getting Started” guide.
Once your Raspberry Pi has rebooted we can get started writing code.
Writing code for your Pico
There is a large amount of example code for Pico, and one of the things that the setup script will have done is to download the examples and build both the Blink and “Hello World” examples to verify that your toolchain is working.
But we’re going to go ahead and write our own.
We’re going to be working in the ~/pico directory created by the setup script, and the first thing we need to do is to create a directory to house our project.
$ cd pico
$ ls -la
total 59284
drwxr-xr-x 9 pi pi 4096 Jan 28 10:26 .
drwxr-xr-x 19 pi pi 4096 Jan 28 10:29 ..
drwxr-xr-x 12 pi pi 4096 Jan 28 10:24 openocd
drwxr-xr-x 28 pi pi 4096 Jan 28 10:20 pico-examples
drwxr-xr-x 7 pi pi 4096 Jan 28 10:20 pico-extras
drwxr-xr-x 10 pi pi 4096 Jan 28 10:20 pico-playground
drwxr-xr-x 5 pi pi 4096 Jan 28 10:21 picoprobe
drwxr-xr-x 10 pi pi 4096 Jan 28 10:19 pico-sdk
drwxr-xr-x 7 pi pi 4096 Jan 28 10:22 picotool
-rw-r--r-- 1 pi pi 60667760 Dec 16 16:36 vscode.deb
$ mkdir blink
$ cd blink
Now open up your favourite editor and create a file called blink.c in the blink directory.
#include "pico/stdlib.h"
#include "pico/binary_info.h" const uint LED_PIN = 25; int main() { bi_decl(bi_program_description("First Blink")); bi_decl(bi_1pin_with_name(LED_PIN, "On-board LED")); gpio_init(LED_PIN); gpio_set_dir(LED_PIN, GPIO_OUT); while (1) { gpio_put(LED_PIN, 0); sleep_ms(250); gpio_put(LED_PIN, 1); sleep_ms(1000); }
}
Create a CMakeLists.txt file too.
cmake_minimum_required(VERSION 3.12) include(pico_sdk_import.cmake) project(blink) pico_sdk_init() add_executable(blink blink.c
) pico_add_extra_outputs(blink) target_link_libraries(blink pico_stdlib)
Then copy the pico_sdk_import.cmake file from the external folder in your pico-sdk installation to your test project folder.
$ cp ../pico-sdk/external/pico_sdk_import.cmake .You should now have something that looks like this:
$ ls -la
total 20
drwxr-xr-x 2 pi pi 4096 Jan 28 11:32 .
drwxr-xr-x 10 pi pi 4096 Jan 28 11:01 ..
-rw-r--r-- 1 pi pi 398 Jan 28 11:06 blink.c
-rw-r--r-- 1 pi pi 211 Jan 28 11:32 CMakeLists.txt
-rw-r--r-- 1 pi pi 2721 Jan 28 11:32 pico_sdk_import.cmake
$
We are ready to build our project using CMake.
$ mkdir build
$ cd build
$ export PICO_SDK_PATH=../../pico-sdk
$ cmake ..
$ make
If all goes well you should see a whole bunch of messages flash past in your Terminal window and a number of files will be generated in the build/ directory, including one called blink.uf2.
Just as we did before with the UF2 file we downloaded from the Getting Started page, we can now drag and drop this file on to our Pico.
Unplug the cable from your Pico, then press and hold the BOOTSEL button on your Pico and plug it back in. Then release the button after the board is plugged in.
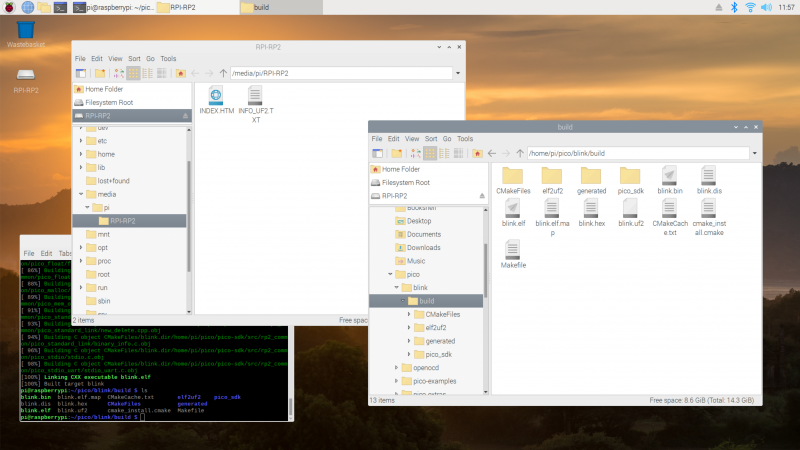
blink.uf2 binary can be dragged and dropped on to our PicoThe RPI-RP2 disk volume should pop up on your desktop again. Double-click to open it, then open a file viewer in the pico/blink/build/ directory and drag and drop the UF2 file you’ll find there on to the RPI-RP2 volume. It will automatically unmount, and the light on your board should start blinking. But this time it will blink a little bit differently from before.
Try playing around with the sleep_ms( ) lines in our code to vary how much time there is between blinks. You could even take a peek at one of the examples, which shows you how to blink the onboard LED in Morse code.
Using Picotool
One way to convince yourself that the program running on your Pico is the one we just built is to use something called picotool. Picotool is a command line utility installed by the setup script that is a Swiss Army knife for all things Pico.
Go ahead and unplug your Pico from your Raspberry Pi, press and hold the BOOTSEL button, and plug it back in. Then run picotool.
$ sudo picotool info -a Program Information name: blink description: First Blink binary start: 0x10000000 binary end: 0x10003344 Fixed Pin Information 25: On-board LED Build Information sdk version: 1.0.0 pico_board: pico build date: Jan 28 2021 build attributes: Release Device Information flash size: 2048K ROM version: 1
$
You’ll see lots of information about the program currently on your Pico. Then if you want to start it blinking again, just unplug and replug Pico to leave BOOTSEL mode and start your program running once more.
Picotool can do a lot more than this, and you’ll find more information about it in Appendix B of the “Getting Started” guide.
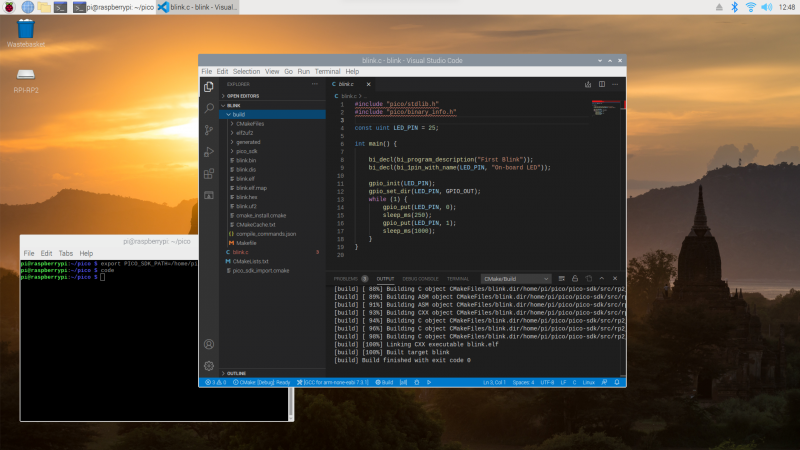
Using Visual Studio Code
So far we’ve been building our Pico projects from the command line, but the setup script also installed and configured Visual Studio Code, and we can build the exact same CMake-based project in the Visual Studio Code environment. You can open it as below:
$ cd ~/pico
$ export PICO_SDK_PATH=/home/pi/pico/pico-sdk
$ code
Chapter 6 of the Getting Started guide has full details of how to load and compile a Pico project inside Visual Studio Code. If you’re used to Visual Studio Code, you might be able to make your way from here without much extra help, as the setup script has done most of the heavy lifting for you in configuring the IDE.
What’s left is to open the pico/blink folder and allow the CMake Tools extension to configure the project. After selecting arm-none-eabi as your compiler, just hit the “Build’ button in the blue bottom bar.
While we recommend and support Visual Studio Code as the development environment of choice for developing for Pico — it works cross-platform under Linux, Windows, and macOS and has good plugin support for debugging — you can also take a look at Chapter 9 of the Getting Started guide. There we talk about how to use both Eclipse and CLion to develop for Pico, and if you’re more used to those environments you should be able to get up and running in either without much trouble.
Where now?
If you’ve got this far, you’ve built and deployed your very first C program to your Raspberry Pi Pico. Well done! The next step is probably going to be saying “Hello World!” over serial back to your Raspberry Pi.
From here, you probably want to sit down and read the Getting Started guide I’ve mentioned throughout the article, especially if you want to make use of SWD debugging, which is discussed at length in the guide. Beyond that I’d point you to the book on the C/C++ SDK which has the API-level documentation, as well as a high-level discussion of the design of the SDK.
Support for developing for Pico can be found on the Raspberry Pi forums. There is also an (unofficial) Discord server where a lot of people active in the new community seem to be hanging out. Feedback on the documentation should be posted as an Issue to the pico-feedback repository on Github, or directly to the relevant repository it concerns.
All of the documentation, along with lots of other help and links, can be found on the same Getting Started page from which we grabbed our original UF2 file.
If you lose track of where that is in the future, you can always find it from your Pico: to access the page, just press and hold the BOOTSEL button on your Pico, plug it into your laptop or Raspberry Pi, then release the button. Go ahead and open the RPI-RP2 volume, and then click on the INDEX.HTM file.
That will always take you to the Getting Started page.
Website: LINK